You can get Auto Clicker on a Free to Download and try basis with trial offering all the features without any limitations. All the Screenshots displayed in this post have been captured on a Windows 10 PC so that you can get an idea about the Application Appearance on Windows 10. Yes the Auto Clicker does works on other Microsoft Windows Operating Systems including Windows 11, Windows 8.1 and of-course Windows 10. The given below Screenshot displays the Main Screen of Auto Clicker offering easy access to all the functionality offered by the software.
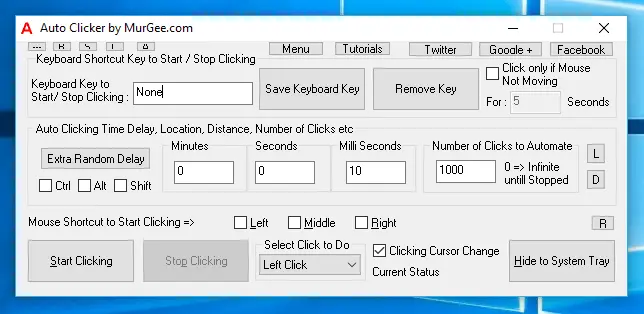
Let’s pause for a little bit and examine the above Screenshot to quickly understand what all types of Mouse Clicking this nifty Desktop Application offers on Windows 10 Computers. Yes, there is too much functionality hidden somewhere on the Graphical User Interface of this Software and this post does uncovers all those features by means of Screenshot and textual content.
- Keyboard Key to Start / Stop Clicking : A Global Keyboard Shortcut which when configured allows you to Start and Stop Automatic Mouse Clicking done by this Mouse Clicking Desktop Application. This Keyboard Shortcut or Hot Key works even when you are Playing a Game or are using another Desktop Application.
- Click Only of Mouse Not Moving : This Control allows you to ensure even when you start Clicking, the Actual Mouse Clicking will start only when you have stopped Moving Mouse Cursor for pre-configured number of Seconds.
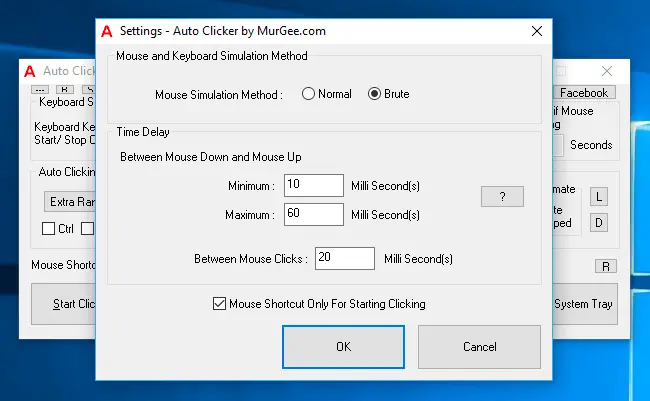
- Auto Clicking Time Delay : There are 3 Text Controls which together allow you to define the time delay between consecutive Automated Mouse Clicks simulated by this Auto Clicker.
- Extra Random Delay : This control allows you to add Extra Random Time Delay to above mentioned fixed time delay between consecutive Automated Mouse Clicks.
- Number of Clicks to Automate : Allows you to define how many times your want your Mouse to Auto Click when started by Keyboard / Mouse Shortcut.
To get started, do understand all the above mentioned points and then give this Mouse Clicking Software a try on your Windows 10 Computer. Once you have downloaded and installed the software, you will get 2 Desktop Shortcuts and their purpose is as mentioned below :
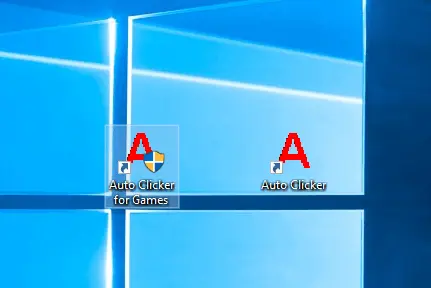
- Auto Clicker : This Desktop Shortcut will allow you to launch Auto Clicker with signed on privileges. You can use this Desktop Shortcut to launch Auto Clicker to Auto Click on Online Games which run in Browser window or other Applications which do not require you to provide Admin Privileges.
- Auto Clicker for Games : This Desktop Shortcut also launches Auto Clicker but requires to to provide Admin Access to it so that it can send Automated Mouse Clicks to Applications / Games launched with Admin Privileges.
Hidden Features of Auto Clicker in Right Click Menu
As this Mouse Clicking Software has too much functionality to offer, it hides lots of functionality in Right Click menu. You can open the Right Click Menu of this Software by either Clicking on the Menu Button at the top center or you can Right Click anywhere on the Main Screen of the Software to view the Right Click Menu as displayed in the Screenshot below.
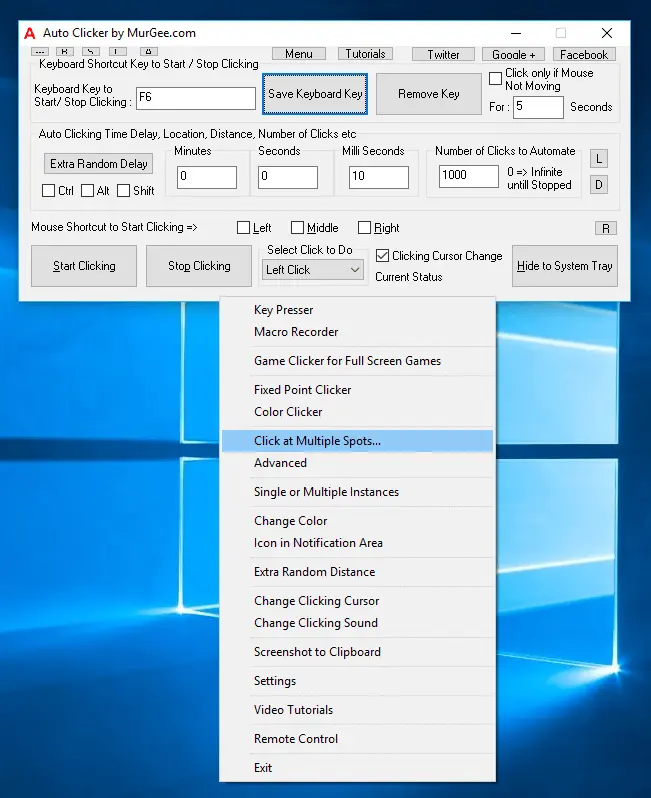
The Main Screen of the Software allows you to Auto Click at current Mouse Cursor Location or at a Fixed pre-defined Screen Location or even at a Random Screen Location, however when you want to Auto Click at Multiple Screen Locations, you can use the Click at Multiple Spots Menu Item from the Right Click Menu as displayed in the Screenshot above. When using the Multiple Spot Clicker for the first time, a tutorial page opens up and provides instructions to use the Multiple Screen Location Mouse Clicking Software.
Do take you time to explore the features offered in the Right Click Menu. To Name a few, you can launch Color Clicker, Fixed Point Clicker, Macro Recorder, Key Presser and Game Clicker for Full Screen Games. Apart from launching new Applications, you can even tweak the behavior of Auto Clicker by configuring it’s Settings, Change Mouse Clicking Cursor or Change Mouse Clicking Sound, etc. Windows Phone Users can even control this Auto Clicker by Enabling the Remote Control option from the Right Click Menu.
How to Launch Auto Clicker on Windows 10
There are multiple ways in which you can launch or open Auto Clicker on your Windows 10 Computer. The easiest way to launch this very best Mouse Clicking Application is to launch it from Desktop Shortcut as mentioned earlier in this post. You can alternatively launch this Mouse Clicker from the Start Menu as displayed in the first Screenshot of this post. Another quick and easy way is to pin the Auto Clicker to taskbar on your Windows 10 Computer as displayed in the screenshot below.
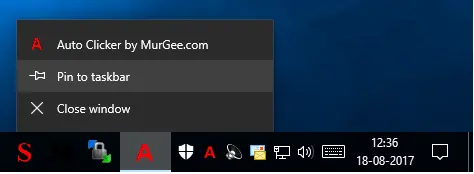
When Auto Clicker Shortcut is pinned to taskbar, you can launch the Software by doing a left Mouse Click on the taskbar shortcut. Yes you can even drag the taskbar shortcut horizontally by using Drag and Drop. Note in the above Screenshot, you can unhide the Application’s Main Window by double clicking on the Icon in the Notification Area. You can alternatively Right Click on Notification Icon of Auto Clicker and then Click on Show MurGee Auto Clicker as displayed in the Screenshot below to view the Main Screen of the Software. Note that this Notification Icon appears only when the Application is running in Memory and is removed from the Notification Tray when the Application is Closed.
With wide acceptance of Windows 10 by Game Developers and other Software Manufacturers, having an Auto Clicker which works fine with Windows 10 can be really helpful to Automate repetitive Mouse Clicking tasks. All the Screenshots captured above have been captured on Windows 10 Computer and the Auto Clicker has been tested extensively on Windows 10 and it works very well. Do give this Software a try to Automate your Mouse Clicking needs and Save Time, Efforts and add accuracy to your Mouse Clicking tasks.